x
The steps in the article walk you through the process of setting up continuous delivery for an Orchard website running in a Windows Azure Cloud Service. The packaging and publishing of a complete Orchard site is easiest if you utilize the AzurePackage.proj MSBuild file included with the Orchard source code, however you need to make a few edits to get it all working. In this article we’ll go step by step through those edits needed.
Before starting at Step 1 you should have your Orchard source stored in a TFS account (http://tfs.visualstudio.com) and have a Cloud Service, Data Account and Sql Server configured in a Windows Azure account (http://manage.windowsazure.com). This walkthrough doesn’t cover those steps, though we are planning on publishing some blog entries to help people out with those steps as well.
In this walkthrough, we’ll go through these steps to get to a Continuous Delivery build configured:
One of the nice features of TFS is the ability to have a build kick off whenever someone checks in changes. This is sometimes called Continuous Integration (CI) or Continuous Delivery (CD). In order to this to happen, we need to first have the Azure Cloud Service connect to the TFS account.
In the Windows Azure Portal:
1. Select the Cloud Service name you created earlier

Figure 1
This takes you to the Cloud Service view.

Figure 2
2. Click on the Set up TFS publishing link (highlighted above)
This opens the Authorize TFS Connection wizard.

Figure 3
3. Enter the name of you TFS account
4. Click the Authorize Now link
This will ask you to Accept the Connection Request

Figure 4
5. Click the Accept button
After the authorization completes, you will see the last page of the wizard:

Figure 5
6. Click the checkmark button in the lower right corner to finish the wizard
Once the Wizard completes and links with the TFS repository, you will now see it in the Deployments tab of your Cloud Service (like shown below).
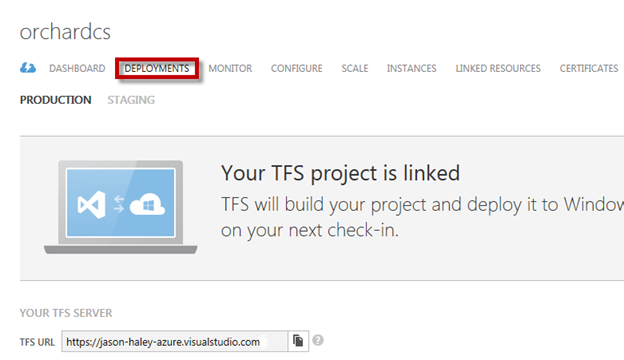
Figure 6
In Visual Studio Team Explorer tool window,
1. Click the Home button

Figure 7
2. Select the Builds link
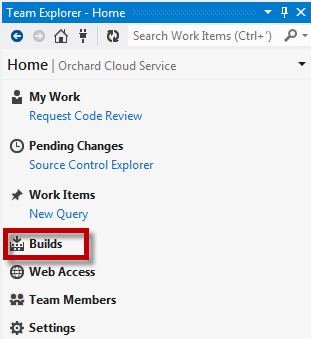
Figure 8
This will show the Build Definitions configured for the project. Notice there is one called %yourcloudservicename%_CD. This was added to the TFS project when Windows Azure linked the cloud service to it.

Figure 9
3. Right click on the link for the %yourcloudservicename%_CD build
4. Select Edit Build Definition…
This shows the General tab of the Build definition.

Figure 10
5. Select the Enabled radio button, in order to allow this build definition to run.
6. Select the Process item in the list, to get the Process properties
7. Find the Solution to Build property and click the ellipses button
This opens a Browse dialog for the TFS projec
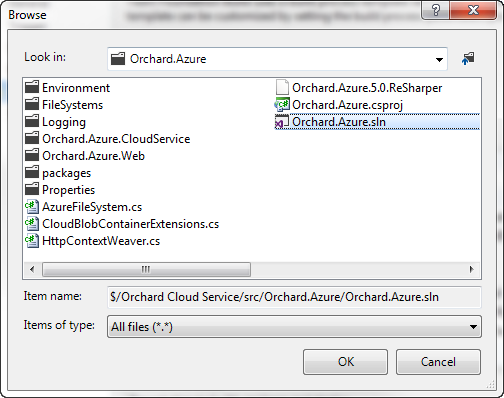
Figure 11
8. Find the Orchard.Azure.sln file and select it
9. Click OK
The Solution To Build property should now show the path to the Orchard.Azure.sln file.

Figure 12
10. Save (Ctrl+S) to save the changes
In the Team Explorer – Builds:
1. Right click on the build definition name for the cloud service
2. Select Queue New Build …

Figure 13
This launches the Queue Build dialog

Figure 14
3. Click the Queue button
This will queue the build to be run. Depending on how busy TFS is, the build should start within a few minutes normally.
In the top of your Team Explorer, you will see the name of your build show up once it is queued:

Figure 15
4. Double click the name of your build under the My Builds section of the Team Explorer
This will take you to the build detail, where you can check the status of the build.
5. Click on the View Build Details link at the top once your build starts
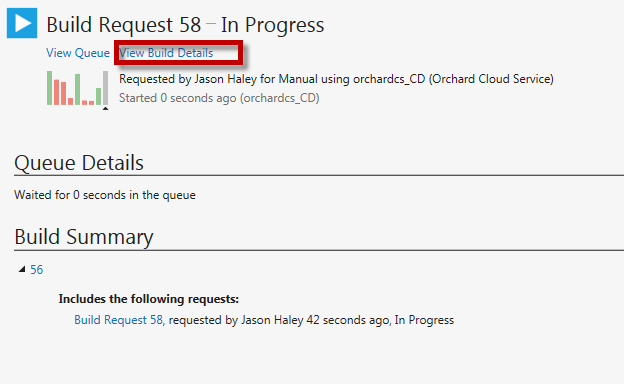
Figure 16
The Build Details view will refresh as the build is processing.

Figure 17
The build should succeed, unfortunately if the build was deployed to a cloud service on Windows Azure you would get the error shown below:
None of the constructors found with 'Public binding flags' on type 'Orchard.Environment.DefaultOrchardShell' can be invoked with the available services and parameters:
Cannot resolve parameter 'Orchard.Mvc.Routes.IRoutePublisher routePublisher' of constructor 'Void .ctor(System.Func`1[Autofac.Features.OwnedInstances.Owned`1[Orchard.Environment.IOrchardShellEvents]], System.Collections.Generic.IEnumerable`1[Orchard.Mvc.Routes.IRouteProvider], System.Collections.Generic.IEnumerable`1[Orchard.WebApi.Routes.IHttpRouteProvider], Orchard.Mvc.Routes.IRoutePublisher, System.Collections.Generic.IEnumerable`1[Orchard.Mvc.ModelBinders.IModelBinderProvider], Orchard.Mvc.ModelBinders.IModelBinderPublisher, Orchard.Tasks.ISweepGenerator)'.
Description: An unhandled exception occurred during the execution of the current web request. Please review the stack trace for more information about the error and where it originated in the code.
Exception Details: Autofac.Core.DependencyResolutionException: None of the constructors found with 'Public binding flags' on type 'Orchard.Environment.DefaultOrchardShell' can be invoked with the available services and parameters:
Cannot resolve parameter 'Orchard.Mvc.Routes.IRoutePublisher routePublisher' of constructor 'Void .ctor(System.Func`1[Autofac.Features.OwnedInstances.Owned`1[Orchard.Environment.IOrchardShellEvents]], System.Collections.Generic.IEnumerable`1[Orchard.Mvc.Routes.IRouteProvider], System.Collections.Generic.IEnumerable`1[Orchard.WebApi.Routes.IHttpRouteProvider], Orchard.Mvc.Routes.IRoutePublisher, System.Collections.Generic.IEnumerable`1[Orchard.Mvc.ModelBinders.IModelBinderProvider], Orchard.Mvc.ModelBinders.IModelBinderPublisher, Orchard.Tasks.ISweepGenerator)'.
This error is due to the cloud service package not having all the necessary files or configuration for an Orchard Website to run on Windows Azure. In order to build Orchard and deploy it successfully with TFS, you will need to make a few customizations.
The easiest way I have found to create a complete package for an Orchard cloud service, is to use the AzurePackage.proj MSBuild file that comes with Orchard (this of course assumes that proj file has been upgraded to the version of the Windows Azure SDK you are moving to since Orchard 1.6.1 was built on an older version of the Azure SDK). Now, for some good news and some bad news…
The good news is: TFS will build a AzurePackage.proj file fine.
In Team Explorer,
1. Click the Home button
2. Select the Builds link
3. Right click on your build definition name, select Edit Build Definition …
4. Select the Process tab
5. Find the Solution to Build property and click the ellipses button
This opens a Browse dialog for the TFS project

Figure 18
6. Find the AzurePackage.proj file and select it
7. Click OK
8. In the Publishing – General section, enter the name of your cloud service name
9. In the Publishing – Azure Cloud Service section:
a. Enter the name of your cloud service for the Alternate Cloud Service Name property
b. Enter the name of your cloud service for the Deployment Label property
c. Click on the ellipses button for the Alternate Publish Profile and find profile under the %orchard%/Service/src/Orchard.Azure/Orchard.Azure.CloudService/Profiles directory
MISSING IMAGE HERE
Figure 19
d. Click Ok to set the path to your setting file
e. Enter the name of you data service account in the Alternate Storage Account Name property.
The following figure highlights all the properties I set for my cloud service:

Figure 20
10. Save your build settings (Ctrl + S)
You now have the AzurePackage.proj configured to be built (instead of the solution) and have added the necessary properties for TFS to publish to the Azure Cloud Service. Let’s build it and see if it works!
In Team Explorer:
1. Right click on your build name
2. Select Queue New Build…
This will open the Queue Build dialog
3. Click Queue
That will queue the build to start soon. Earlier I gave the good news about TFS building the proj just fine, now the bad news: it is going to fail.
The build will start and fail within a few minutes giving the following error message:
Exception Message: Please specify a Visual Studio Solution (.sln) to build. (type BuildFromSolutionException)Exception Stack Trace: at System.Activities.Statements.Throw.Execute(CodeActivityContext context) at System.Activities.CodeActivity.InternalExecute(ActivityInstance instance, ActivityExecutor executor, BookmarkManager bookmarkManager) at System.Activities.Runtime.ActivityExecutor.ExecuteActivityWorkItem.ExecuteBody(ActivityExecutor executor, BookmarkManager bookmarkManager, Location resultLocation)
Figure 21
The source of this exception is the FindCCProjInSln activity in the AzureContinousDeployment.11.xaml file.
The FindCCProjInSln activity looks up the Cloud Service project in the solution in order to build the settings needed to run CSPack (which means it has a requirement of there being a solution file in the first place!). CSPack is the utility that builds the cspkg package under the covers.
However in our case, we want build the AzurePackage.proj – which has its own logic to run CSPack. This means can remove the FindCCProjInSln activity from the AzureContinousDeployment.11.xaml file.
The build definition xaml files are kept in source control, which means we can edit them safely knowing we can always rollback if needed.
In Team Explorer:
1. Click on the Home button
2. Under Pending Changes, select Source Control Explorer
3. Select the BuildProcessTemplates node
4. Double click on the AzureContinuousDeployment.11.xaml file in the file listing

Figure 22
This will open the workflow editor.
5. Click on the tab of the workflow editor or the outer part of the workflow diagram, Edit menu -> Find and Replace -> Quick Find (or Ctrl + F)
This opens the Find and Replace Dialog

Figure 23
6. Type “ccprojname” in the Find what: text box, click Find Next
This should take you to the area of the diagram were we are going to delete two activities (shown below):

Figure 24
7. Select the Find the Azure Project in the Solution, FindCCProjInSln activity
8. Right click, select Delete
9. Select the Set Project to build CSPack assignment right below where the FindCCProjInSln activity was
10. Right click, select Delete
The sequence should now look like this:

Figure 25
Removing those activities gets rid of source of the build exception and also something that wasn’t necessary due to our MSBuild proj already taking care of the CSPack for us.
There is one more customization we need to do to this xaml file: add a parameter to pass the BinariesDirectory variable to the MSBuild. On the TFS server, the BinariesDirectory is usually “c:\a\bin”, but just in case it changes, passing the variable is safer.
Looking in your workflow designer surface, you should be able to see the MSBuild activity towards the bottom of your screen (it is in the same parent as the sequence you just edited). However, if you don’t see it you can search for: Run MSBuild for Project. Once you have found the MSBuild activity, open the Properties tool window.
In the Properties tool window,
1. Find the CommandLineArguments property and click on the ellipses button

Figure 26
This will open the Expression Editor.
2. Change the CommandLineArguments text in the editor to the following (should be a single line):
String.Format("/p:SkipInvalidConfigurations=true /p:BuildDir={0} {1}", BinariesDirectory, MSBuildArguments)
This will be the new expression that lets the MSBuild project know what directories it should be using on the server.
3. Click OK
4. Save your changes to the AzureContinuousDeployment.11.xaml file
Now we need to make a couple of small changes to the AzurePackage.proj file in order to use the BuildDir property TFS is now passing to it.
There are a couple of changes needed in the AzurePackage.proj file:
· Use the new BuildDir property to put files where TFS expects them
· Create a new Target specifically for TFS to call
In Team Explorer:
1. Click the Home button
2. In the Pending Changes section, click on the Source Control Explorer link
3. On the folder side of the Source Control Explorer, select your cloud service name
4. On the file side, double click the AzurePackage.proj file to open it

Figure 27
5. Add the following highlighted PropertyGroup below the existing one:
<PropertyGroup>
… existing property group here …
</PropertyGroup>
<!-- Reset folders when BuildDir property is passed in -->
<PropertyGroup Condition="$(BuildDir) != ''">
<BuildFolder>$(BuildDir)\app.publish</BuildFolder>
<StageFolder>$(BuildFolder)</StageFolder>
</PropertyGroup>
This property group will reset the BuildFolder and StageFolder values, but only if the BuildDir property is passed.
The default target for the AzurePackage.proj file is the Build target. Normally that is what you want when building locally however out of the box some of the tests in the Orchard test suite require the Windows Azure Storage Emulator to run and those will fail on the build server. We also don’t need to perform the Clean target on the build server.
1. Find the existing Build target (should be line 29 or 30)
2. Add the new highlighted target shown below above it:
<!-- Target for TFS CI to call -->
<Target Name="TfsCIBuild">
<CallTarget Targets="Compile"/>
<CallTarget Targets="Package"/>
</Target>
<Target Name ="Build">
… existing build target here …
</Target>
3. Save your changes to the AzurePackage.proj file.
Now you need to check all your changes in to the AzureContinuousDeployment.11.xaml file and the AzurePackage.proj file.
In the Source Code Explorer:
1. Right click on the name of your cloud service
2. Select Check In Pending Changes…
3. Add a short comment, click Check In
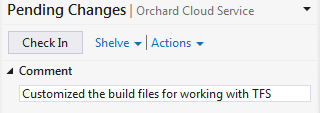
Figure 28
In Team Explorer,
1. Click the Home button
2. Select the Builds link
3. Right click on your build definition name in the All Build Definitions section
4. Select Edit Build Definition…
5. Select the Process tab
6. Find the Advanced area and expand it
7. Find the MSBuild Arguments property and enter: /t:TfsCIBuild

Figure 29
8. On the Trigger tab
9. Select Continuous Integration – Build each check-in

Figure 30
10. Save your changes
11. Right click on your build definition name -> Queue New Build…
12. Click Queue
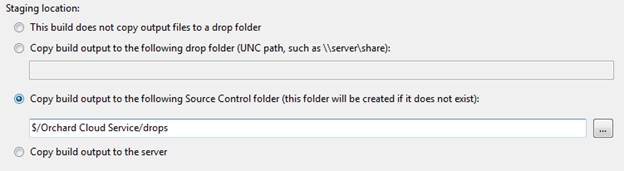
Tip:
You can setup a drop folder for you builds and build logs to be stored in. This can be really helpful when you are troubleshooting a build and trying to see what exactly was built.
On the Edit Definition view:
1. Select the Build Defaults tab
2. Choose the Copy build output to the following Source Control folder choice
3. Enter a directory path to store the builds.
Jason Haley
Software Engineer


